Introduction
In the latest iteration of Microsoft’s operating system, Windows 11, the ability to manage multiple virtual desktops has been refined and streamlined for enhanced productivity. This feature allows users to compartmentalize their workspaces, creating separate environments tailored to different tasks or projects. In this extensive guide, we’ll explore various ways to create, customize, and switch between virtual desktops in Windows 11, helping you navigate your digital workspace with efficiency and ease.

I. Understanding Virtual Desktops in Windows 11
Virtual desktops in Windows 11 are a powerful feature that enables users to create multiple, separate workspaces within a single physical desktop. This functionality allows for better organization and multitasking by letting you switch between various sets of open applications without cluttering your screen or losing track of your workflow.
How Virtual Desktops Work:
In Windows 11, you can create multiple virtual desktops and customize each with its own set of running apps and windows. For instance, you might have one virtual desktop for work tasks with email, word processing, and project management tools open, another for personal use with web browsers and social media apps, and a third for entertainment with games or streaming services.
Creating Virtual Desktops:
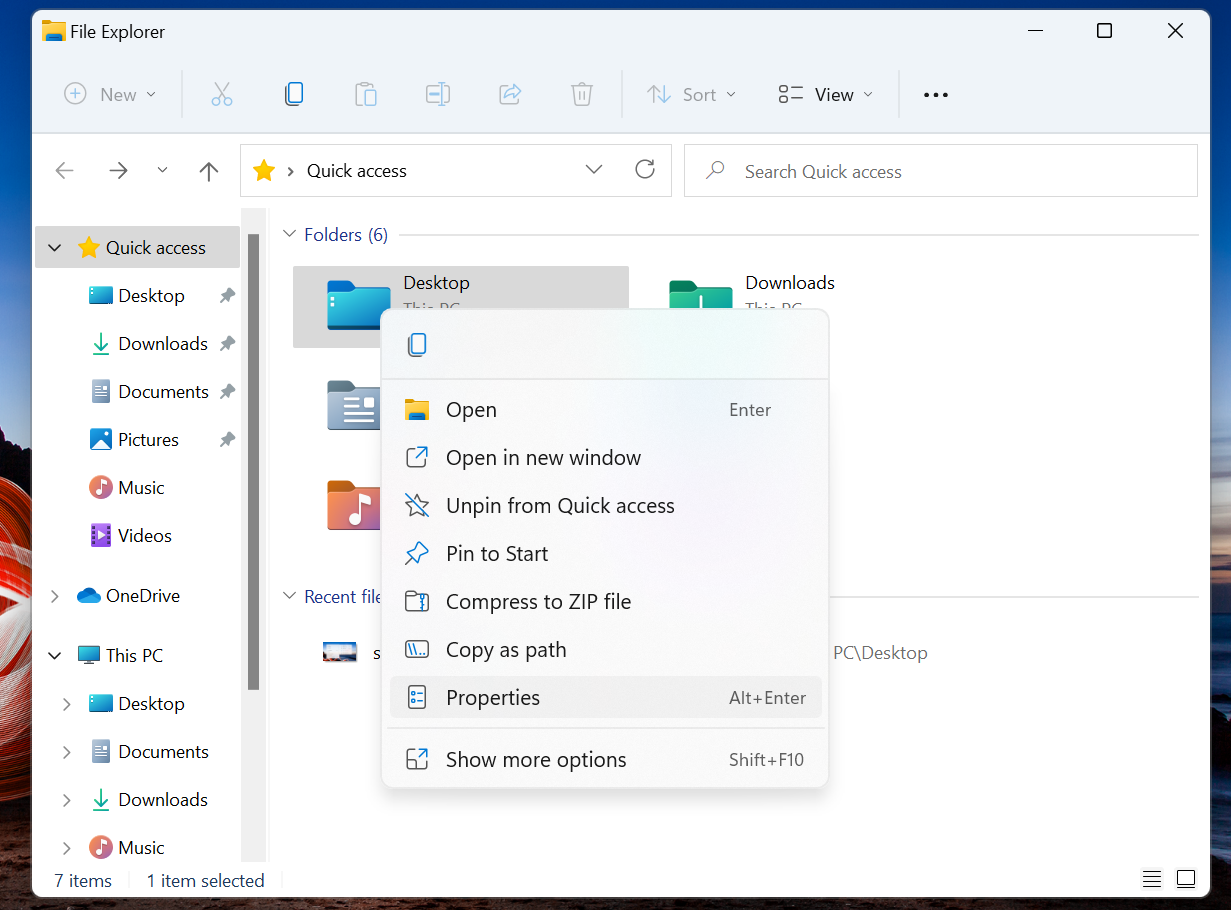
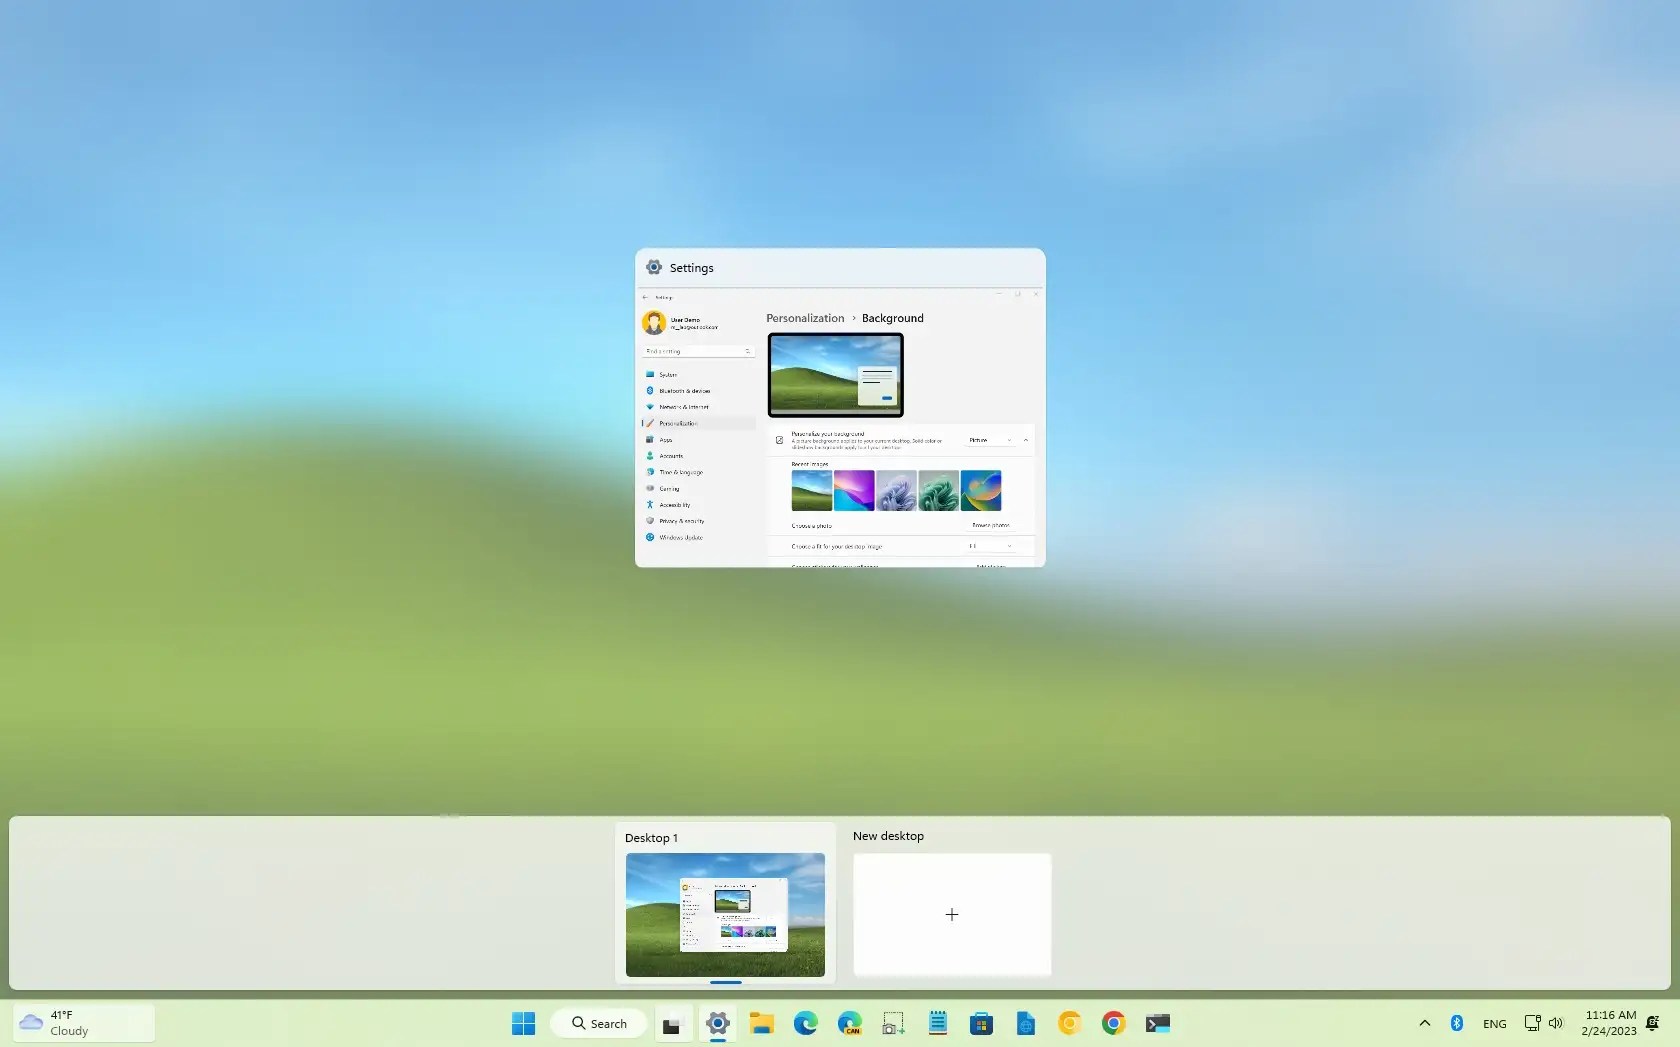
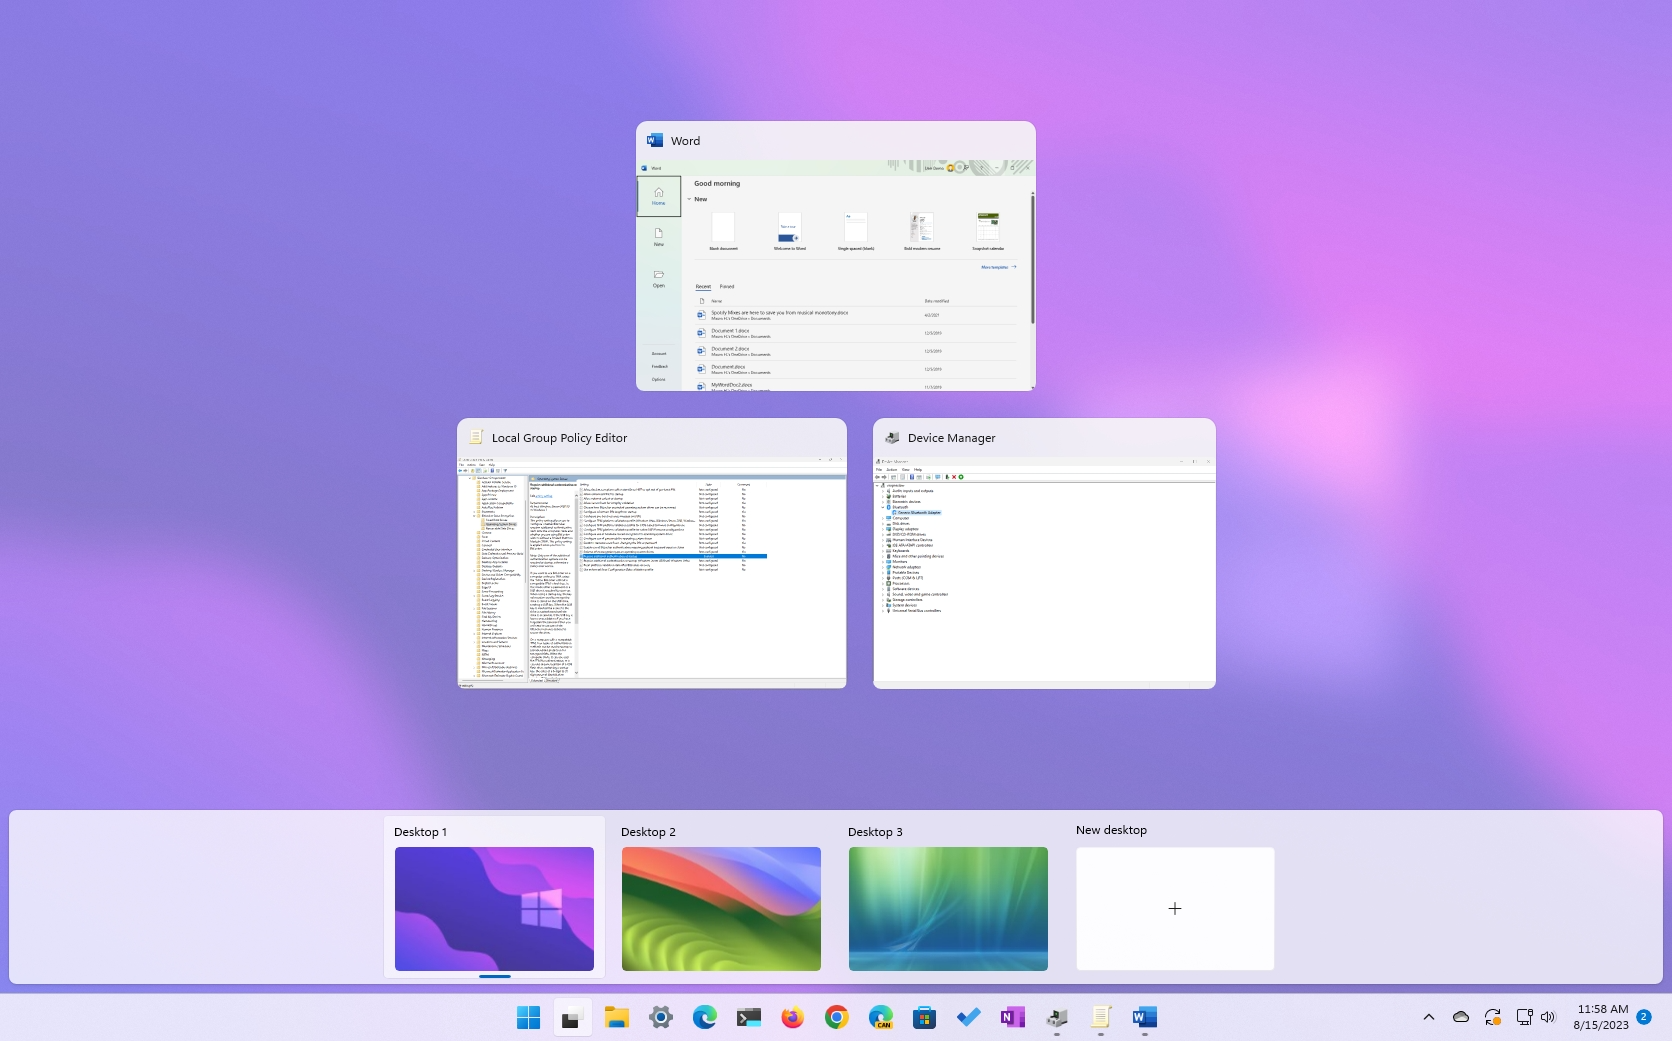
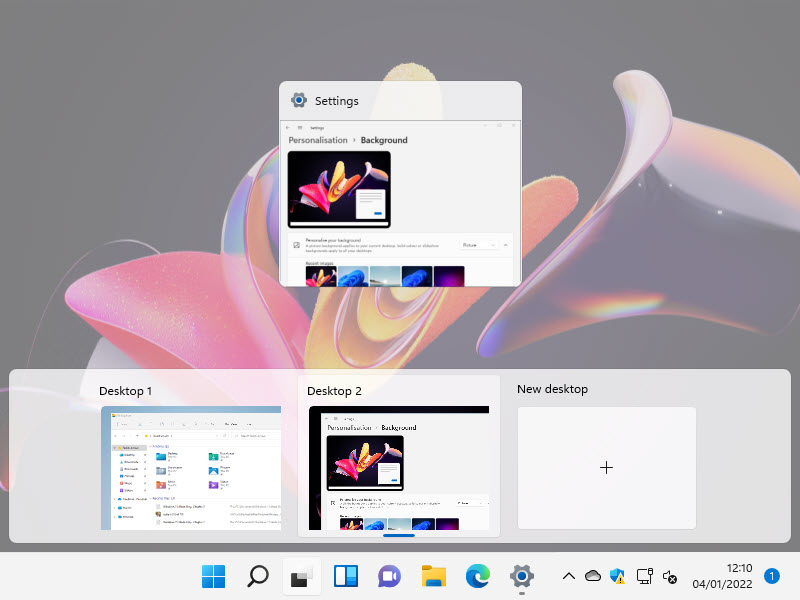
- To create a new virtual desktop in Windows 11, click on the Task View button (the icon that looks like two overlapping rectangles) on the taskbar or press Win + Tab on your keyboard.
- In the Task View interface, click on the “+” symbol at the top of the screen to create a new desktop.
Switching Between Virtual Desktops:
- To switch between your created desktops, again use the Task View interface (Win + Tab) where you’ll see thumbnails representing each virtual desktop.
- Alternatively, you can cycle through them using the keyboard shortcut Win + Ctrl + Left/Right Arrow.
Closing Virtual Desktops:
- When you’re done with a virtual desktop, return to the Task View (Win + Tab) and hover over the desktop you want to close. Click on the “X” that appears on the top-right corner of the thumbnail to delete that particular virtual desktop. Note that any open windows will be moved to the previous desktop.
Customizing Virtual Desktops:
Windows 11 also allows you to name your virtual desktops for easier identification and manage which apps appear on which desktop. You can drag and drop app windows from one virtual desktop to another while in Task View.
Overall, virtual desktops are an excellent tool for productivity, helping to streamline workflows and maintain focus by compartmentalizing different aspects of your digital life into their own dedicated spaces.
II. Creating New Virtual Desktops
Creating new virtual desktops in Windows 11 is a simple process that allows you to expand your workspace and manage multiple tasks more efficiently. Here’s how you can create a new virtual desktop:
Step-by-Step Guide:
-
Using the Task View Button:
- Locate the Task View button on the taskbar, which appears as two overlapping rectangles. It’s usually found next to the Start button.
- Click on the Task View button. This will open a full-screen display showing all currently open windows and any existing virtual desktops.
-
Create a New Desktop:
- In the Task View screen, look towards the top of the window. You’ll see an icon with a “+” symbol. This is the “New Desktop” button.
- Click on the “+” button to instantly create a new virtual desktop.
Alternatively, you can also use keyboard shortcuts to create a new virtual desktop:
Using Keyboard Shortcut:
- Press Win + Tab to bring up the Task View interface.
- While in the Task View, press Ctrl + Win + D. This shortcut directly creates a new virtual desktop.
As soon as you create a new virtual desktop, you’ll be able to customize it by opening or moving different applications and windows into it. Switch between your created virtual desktops using either the Task View or the keyboard shortcut Win + Ctrl + Left/Right Arrow to navigate between them.
Once you have set up your virtual desktops with specific apps for various tasks, you can seamlessly switch contexts without the visual clutter of having all your open applications visible at once.
III. Switching Between Virtual Desktops
Switching between your created virtual desktops can be done in several ways:
- Taskbar: Hover over the Task View button to preview all your desktops. Click on the thumbnail of the desired desktop to switch to it.
- Keyboard Shortcuts: Use Win + Ctrl + Left/Right Arrow keys to cycle through your virtual desktops left or right.
- Touchscreen Gestures: On touch-enabled devices, swipe from left to right (or vice versa) on the screen with three fingers to navigate between desktops.
- Task View Interface: Press Win + Tab to enter the Task View. Here, simply click on the thumbnail of the desktop you want to switch to.
IV. Moving Applications Between Desktops
Windows 11 lets you move apps between desktops to further optimize your workflow:
- In Task View: Open Task View (Win + Tab) and drag the application window to the thumbnail of the destination desktop.
- Using Keyboard Shortcuts: Select the window you wish to move, then press Win + Ctrl + Left/Right Arrow to shift the app to the adjacent desktop.
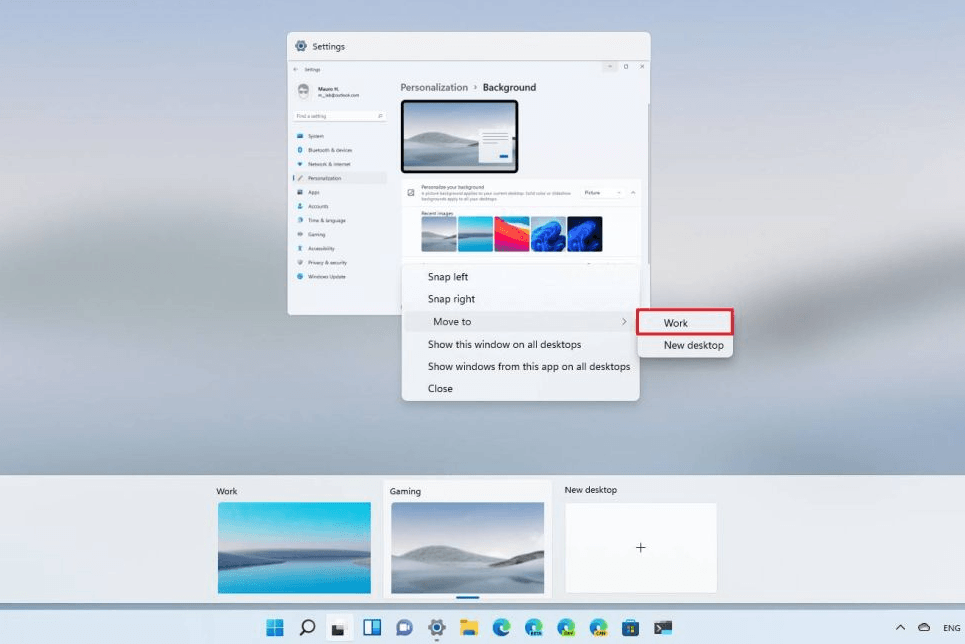
- App Thumbnails: Right-click on the app’s thumbnail in the Taskbar and select “Move to” followed by the name of the target desktop.
V. Customizing Virtual Desktop Settings and Personalization
Each virtual desktop can be personalized with its own background image. To do this:
- Navigate to the desired desktop.
- Right-click the desktop and choose “Personalize”.
- Under Background settings, select a new image for that specific desktop.
Moreover, while there isn’t a built-in way to rename virtual desktops in Windows 11, third-party tools can provide this functionality if you require more detailed organization.
VI. Advanced Tips and Tricks
- Desktop Previews: Hold the Win + Tab keys down to see an expanded view of all your virtual desktops and easily identify where each application is located.
- Power User Tip: Use the Run command (Win + R) to directly access the virtual desktop manager for quick adjustments.
- Grouping Apps: Create groups of apps within a single desktop and save them as a custom layout for faster setup later.
Conclusion
Mastering the art of switching between virtual desktops in Windows 11 is key to unlocking enhanced productivity and focus. By creating distinct workspaces for different aspects of your digital life, you can minimize distractions and streamline your multitasking capabilities. With the array of intuitive methods provided by Windows 11, managing your virtual desktops becomes a seamless process, empowering you to optimize your workflow according to your needs. Embrace these features to transform your Windows experience into a highly efficient and organized digital environment.