Introduction to Windows Configuration Tools
Windows offers an array of configuration tools designed to empower users to tailor their computing experience. Whether you’re a beginner or an IT professional, these tools facilitate the customization and management of the Windows operating system in a way that meets your specific needs. By leveraging such tools, you can modify system settings, monitor resource usage, manage system health, and troubleshoot problems efficiently.
These essential tools are easily accessible and come with different levels of complexity, allowing users of all skill levels to take advantage of what Windows has to offer. From the user-friendly Settings app to the in-depth Registry Editor, each tool serves a unique purpose in enhancing system management.
Understanding how to access and use these tools is crucial. It not only allows for optimized system performance but also helps in maintaining the overall health of your computer. This blog post will guide you through the various Windows configuration tools, offering insights on how to navigate and utilize each one effectively.
Armed with knowledge, you can approach system customization with confidence. Let’s start with the Settings app and explore how to harness its capabilities to customize your Windows settings according to your preferences.
Accessing and Using the Settings App
Navigating through your Windows system and personalizing it to fit your specific needs is straightforward with the Settings app. This user-friendly platform replaces the traditional computer control panel with an intuitive interface divided into simple categories. In this section, we will explore how to use the Settings app and offer valuable tips to customize your Windows environment.
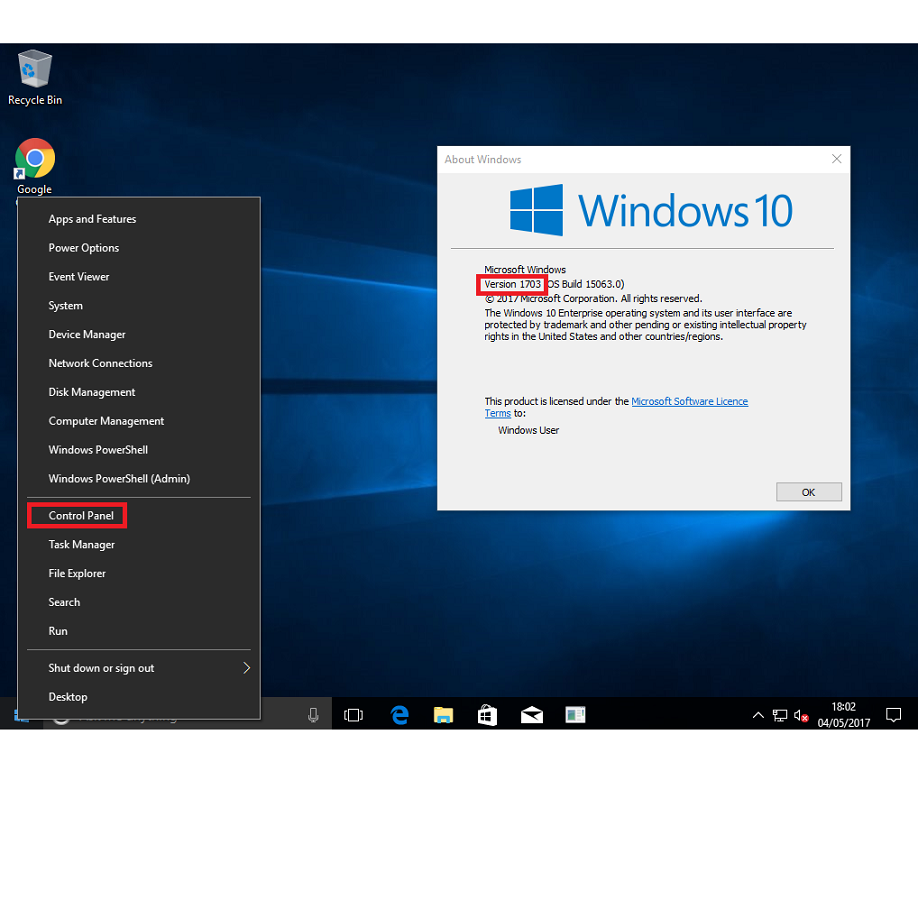
Upon opening the Settings app, you’ll find various categories, each housing related settings. The major categories include System, Devices, Network & Internet, Personalization, Accounts, Time & Language, Ease of Access, Privacy, and Update & Security. To find a specific setting, you can select the appropriate category or use the search bar at the top of the app window. Right-clicking the Start button or using the Windows + I keyboard shortcut swiftly brings up the Settings app.
Tips for Customizing Windows Settings
To tailor your Windows experience, begin with the Personalization category. Here, you can change background images, alter the color scheme, lock screen settings, and more. Customizing the start menu and taskbar to your liking is also possible in this section. For performance tweaks, dive into the System category to manage display settings and notifications. For those who value privacy, visiting the Privacy category allows you to control which apps can access your location, camera, and microphone.
Remember, as you explore the Settings app, the search functionality is a powerful tool for quickly locating specific settings. Also, keep your system up-to-date by regularly checking the Update & Security section, ensuring optimal system performance and security. Windows continually improves the Settings app, making it the central hub for all your configuration needs.
Task Manager: Monitoring and Managing System Resources
Keeping an eye on your system’s health and efficiently managing its resources is a breeze with Task Manager. This utility offers a real-time snapshot of your computer’s performance. It helps in assessing and overseeing every application and process running on your machine. Let’s delve into how the Task Manager can become an indispensable tool in optimizing your Windows experience.
Managing Running Applications and Processes
If an application freezes or isn’t responding, Task Manager comes to the rescue. You can force close such applications without needing to restart your entire system. It’s simple to access Task Manager: just right-click on the Start menu and choose ‘Task Manager’, or use the quick keyboard shortcut CTRL+SHIFT+ESC. Within Task Manager, the ‘Processes’ tab provides a comprehensive list of actively running applications and background processes. Clicking on any process gives you the option to ‘End task’, freeing up valuable system resources.
Analyzing System Performance Metrics
The Performance tab in Task Manager is key for users looking to monitor their system’s efficiency. Here, you’ll gain insights into CPU usage, memory consumption, disk activity, and network throughput. This information is displayed in easy-to-understand graphs and charts, making it simple to spot trends and potential problems. For those eager to refine their system’s performance, Task Manager delivers the necessary statistics to make informed decisions. By understanding your system’s resource utilization, you can take actions like increasing memory or managing startup items for enhanced overall performance.
The Role of Computer Management
Computer Management is an integral component that provides a centralized platform for a range of administrative tasks. It’s particularly designed for IT professionals and advanced users who need an all-in-one interface to oversee various system aspects.
Managing Disks and Services
With the Computer Management console, managing your computer’s discs and services is simple and efficient. The Disk Management tool allows for creating partitions, formatting drives, and assigning drive letters. This central access point ensures you can easily adapt storage to your needs. Services management is just as straightforward; you can start, stop, and configure Windows services with just a few clicks.
Administering users and sharing folders is a breeze with Computer Management. By navigating to the ‘Local Users and Groups’ section, you can add or remove users and edit their properties. The ‘Shared Folders’ area lets you manage shared resources on your network, controlling who has access and what they can do with shared files and folders.
Event Viewer: Tracking System Health and Activity
The Windows Event Viewer offers a clear window into your system’s health and activities. This tool records event logs that are crucial for tracking down issues and maintaining system stability. As a central repository for event logs, it is an essential utility for administrators and advanced users.
Using Event Logs for Troubleshooting
When your system encounters a hiccup, the Event Viewer is your first line of defense. It collects detailed records of every significant event on your Windows device. This includes system errors, warnings, and informational messages. By reviewing the event logs, you can identify the root causes of problems. Opening the Event Viewer is simple: search for it in the Start menu or use the keyboard shortcut Windows + R, type ‘eventvwr.msc’, and press Enter.
Filtering and Exporting Event Data
With the massive amount of log data Event Viewer can accumulate, locating the relevant information might seem daunting. However, the tool allows you to filter logs by event level, date, or keywords, streamlining the search process. In the Windows Logs and Applications and Services Logs sections, you can spot trends or specific events that need your attention. Exporting this data for external analysis or reporting is also an option, which can prove invaluable for troubleshooting and complying with security policies.
Understanding the Control Panel
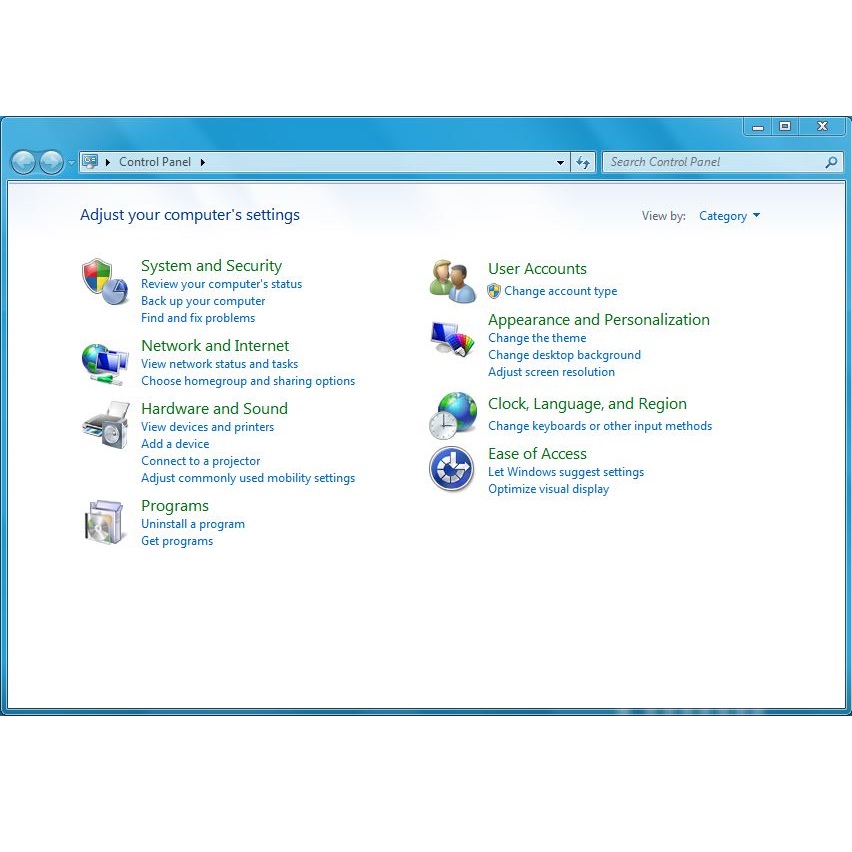
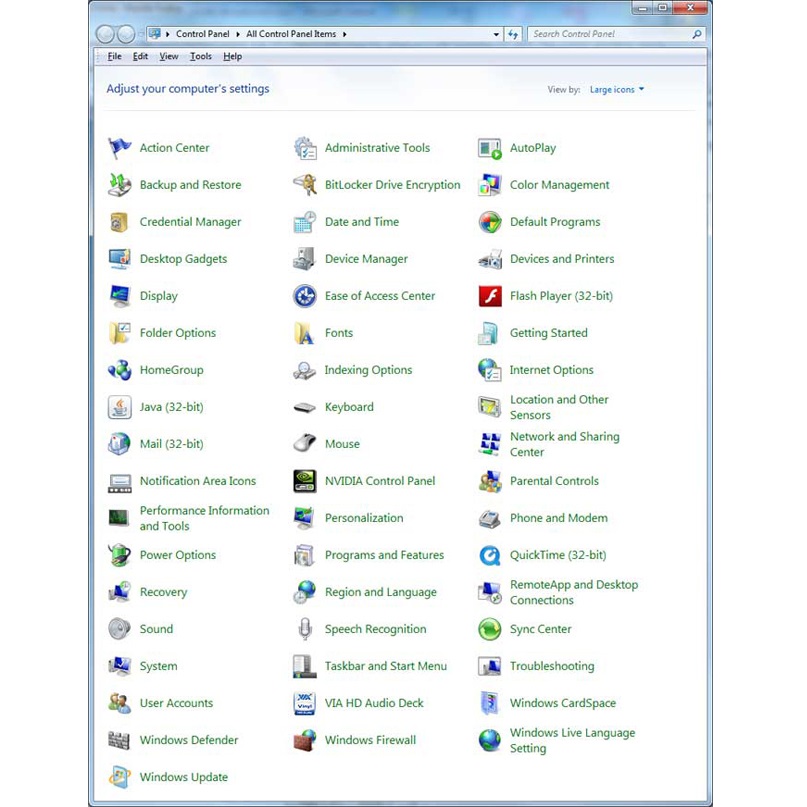
The Control Panel has been an integral part of Windows for many years. It offers a centralized approach to modifying system settings and controls. In this section, we will see how to navigate the Control Panel and use its various applets and settings.
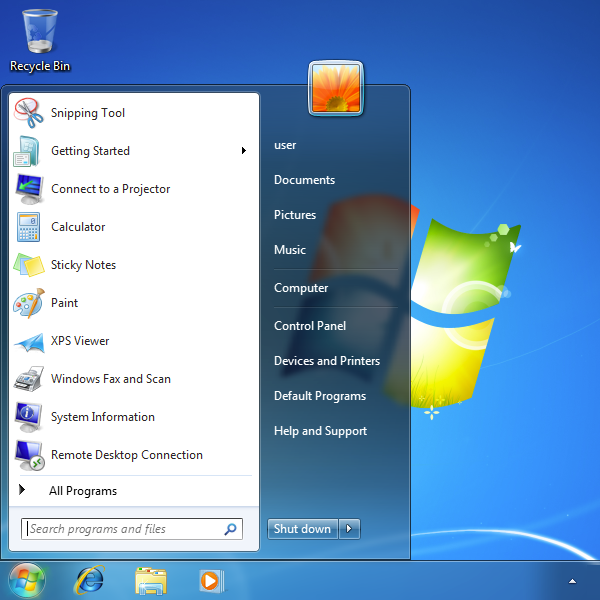
The Control Panel is easy to locate; just search for it in the Start menu or press Windows + R, type ‘control’, and hit Enter. Within it, you will find different applets that allow you to adjust settings for system time, hardware, network configurations, and more. Although some settings have moved to the Settings app, Control Panel remains useful for accessing legacy settings yet to make that transition.
Transition from Control Panel to Settings App
Windows is gradually shifting many Control Panel functions to the modern Settings app. The Settings app offers a cleaner and more intuitive interface. It is updating to always support the latest features. For newer settings adjustments, it is recommended to use the Settings app instead of the Control Panel. Remember, if you can’t find a setting in Control Panel, check the Settings app—it likely has what you need.
System Configuration for Startup Management
Managing how your computer starts up is crucial in maintaining quick and efficient system performance. The System Configuration tool is your ally here, granting control over startup processes and services. This section will teach you how to customize startup settings and use this tool to troubleshoot startup issues.
Customizing the Startup Process
In the ‘System Configuration’ utility, you will find several tabs like ‘General’, ‘Boot’, ‘Services’, and ‘Tools’.
- Access ‘Services’ to disable non-essential services that may be slowing down startup.
- Use the ‘Boot’ tab to manage boot options, such as booting in Safe Mode.
- ‘General’ tab allows for basic startup options, like launching with a diagnostic or selective startup.
To open System Configuration, type ‘MSConfig’ in the ‘Run’ dialog (Windows Key + R) and press Enter.
Troubleshooting with Selective Startup Options
Selective startup in System Configuration is handy for identifying issues.
- It lets you start with basic services and programs to pinpoint problems.
- By checking or unchecking boxes, you can isolate variables and determine causes of startup problems.
- Remember to backup your system before making changes to avoid any accidental system instability.
These steps help ensure a smooth, functional start to your Windows environment, cutting down on frustrating wait times and potential conflicts that can arise during the startup process.
Gathering Data with System Information
Navigating the nuances of your Windows device requires a good understanding of its hardware and software environments. The System Information tool offers a broad viewpoint of your system’s components. This knowledge is key when you are looking to upgrade, maintain or troubleshoot your device.
Overview of Hardware and Software Environments
To capture a detailed report of your computer’s setup, the System Information tool is the go-to utility. It lists hardware details like your processor, memory, and graphics card. It also shows drivers, services, and application details in your software environment. To open it, use the shortcut Windows + R, type ‘msinfo32’, and press Enter.
Use this tool to review your device’s specs before adding new software or equipment to ensure compatibility. It can help spot potential hardware upgrades or reveal drivers that may need an update for better performance.
Tips for Diagnosing Configuration Issues
When faced with system problems, System Information is a strong ally. It can help you zero in on mismatches in your system’s configuration that may cause issues. Here are a few tips:
- Check the ‘Components’ section to confirm all hardware is properly recognized.
- Look at ‘Software Environment’ to review running tasks and loaded drivers which can be sources of conflicts.
- Utilize the ‘System Summary’ to get a quick snapshot of your system’s state.
Remember to run System Information with Administrator privileges. This grants you full insight into drivers and services that affect your system’s behavior. With these insights, you can make informed decisions that keep your Windows system running smoothly.
Registry Editor for Advanced Configuration
The Registry Editor is a vital tool for advanced configuration of system policies and application settings that are not available in the Settings app or Control Panel. By navigating the hierarchical structure of the registry, you can modify settings for hardware, software, and user preferences that affect the behavior of your system. This tool is especially useful for IT professionals who need to manage system configurations beyond what’s provided in the graphical user interface.
Modifying System Policies and Application Settings
To customize system policies or alter application settings, launch the Registry Editor by typing ‘regedit’ in the Run dialog (Windows Key + R) and pressing Enter. Navigate through the registry tree to locate the specific keys or values you wish to change. With right-click options, you can create and edit values that control various aspects of system operation and application behavior. This includes settings related to startup programs, user interface tweaks, and system performance enhancements.
Precautions and Best Practices for Registry Editing
Editing the registry comes with inherent risks. Making incorrect changes can lead to system errors or malfunction. Therefore, it’s crucial to follow some best practices:
- Always back up the registry before making any changes. This can save you from potential system crashes or data loss.
- Be precise and careful when editing. Only change values that you understand and are sure will have the desired effect.
- Use trusted sources or consult with experts if you’re unsure about a particular setting. Some changes require deep knowledge of how Windows operates.
- Keep a record of the original values of any settings you alter, so you can revert if needed.
By taking these precautions, you can make use of the Registry Editor’s powerful capabilities while minimizing risks to your system’s stability and functionality.
Local Group Policy Editor for Policy Management
Navigating policy management in Windows is streamlined through the Local Group Policy Editor. This powerful tool allows administrators to tailor computing environments on single computers. This secures both performance and adherence to organizational standards without affecting other machines in the network.
Configuring Policies for Individual Computers
Administering system policies is made efficient with the Local Group Policy Editor. Through an organized interface, you can set policies related to security, system control, and user configurations. Accessing this tool is straightforward: search for it in the Start menu or press Windows Key + R, type ‘gpedit.msc’, and hit Enter. Modify settings that control user rights, password policies, and software restrictions according to specific needs.
Considerations for Non-Domain Environments
The Local Group Policy Editor is not available on Windows Home editions. It’s best suited for Windows Pro or Enterprise versions used in non-domain environments. For those not on a network domain, this editor is essential for managing group policies. Desktops or devices working independently from centralized domain control still require policy management for security and system stability. Always proceed with caution; incorrect settings can impact your system’s operation seriously.
Utilizing Advanced System Settings
Advanced System Settings opens the door to fine-tuning your Windows experience. It allows you to adjust settings not found in the regular menus. This tool is great for IT experts or experienced users wanting more control over their computers.
Adjusting Performance and User Profile Settings
In Advanced System Settings, you can change how Windows looks and feels. You’ll find options to speed up your computer like altering visual effects or virtual memory. There’s also a place for managing user profiles. It’s helpful when you need to move data or fix profile issues.
To get there, right-click on This PC on your desktop, select Properties, then Advanced System Settings. Look for Performance Settings to make changes affecting speed and appearance. Under User Profiles, click Settings to work with user data.
Accessing Advanced System Properties
For settings beyond regular menus, Advanced System Properties is key. You can set environment variables and look at system startup and recovery options here.
Finding this tool is easy. You can access it from the System Properties window or Control Panel. Click on Advanced System Settings, then go to the Advanced tab. Look for the section you want, like Startup and Recovery, to make your tweaks.
Remember to take care with any changes. They can affect your computer’s performance and stability.


